In today’s data-driven world, businesses are constantly generating vast amounts of information that must be analyzed quickly and effectively. Think about companies like Netflix, which processes user behavior data to recommend movies and shows you are likely to enjoy. Or take ride-hailing services like Uber, which rely on real-time data analysis to optimize routes and match drivers with passengers. In these scenarios, data is not just stored—it’s actively shaping the customer experience, often in real time.
As businesses grow, so does their data, turning the challenge from mere storage into ensuring that data is readily accessible for timely analysis. The larger the datasets, the more crucial it becomes to handle them efficiently and at scale.
This is where Amazon Redshift steps in. Redshift is a powerful data warehousing solution that lets businesses run complex queries and perform analytics on massive datasets. For example, a global retailer might use Redshift to analyze purchasing trends across millions of transactions or predict inventory needs in real time. With Redshift, organizations can dive deep into their data, uncover insights that drive smarter decisions, and deliver better customer experiences.
In this guide, we will walk through the process of moving data from Amazon S3 into Amazon Redshift—equipping your team to fully leverage your data for real-time analytics. Let us get started by setting up the necessary infrastructure and permissions.
Step 1: Set up communication between apps
Before we can begin moving data, we need to ensure that our services can communicate securely and efficiently. In AWS, this is done through an Identity and Access Management (IAM) role, which grants the necessary permissions to interact with other AWS services like S3, Redshift, and EC2. Think of it as setting up a key that unlocks access between different services, ensuring they can work together seamlessly.
Creating an IAM role is the first step in our journey, and it will lay the foundation for everything that follows. This role will allow our Redshift cluster to securely access the data stored in S3 and perform the operations we need.
Note: If you’re unfamiliar with generating programmatic access keys, refer to AWS documentation for a guide.
Step 2: Create a Redshift Cluster Using Boto3
With our permissions in place, it is time to create the heart of our data warehousing solution—the Redshift cluster. This cluster is where all the heavy lifting happens, from storing massive datasets to running complex queries.
We will use Boto3, AWS’s Python SDK, to programmatically create this cluster. This approach gives us flexibility and control, allowing us to automate the creation and management of our data warehouse.
However, like all complex operations, there can be challenges. For example, you might encounter an error about a missing default subnet. Do not worry—we will guide you through troubleshooting this issue so you can get your cluster up and running smoothly.
Troubleshooting:
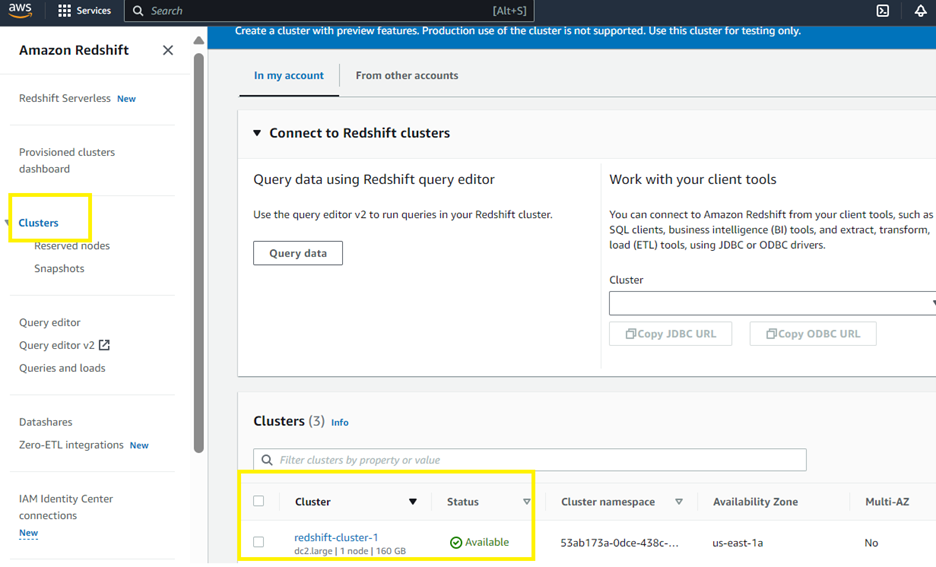
Before moving on, it’s essential to confirm that the Redshift cluster has been successfully created. By doing this, we ensure that everything is set up correctly, avoiding issues down the line. If you run into any problems, such as a missing subnet, we have included steps to resolve them so you can continue with confidence.
AWS_ACCESS_KEY = 'ACCESS_KEY'
SECRET_KEY = 'SECRET_KEY'redshift = boto3.client('redshift', aws_access_key_id=AWS_ACCESS_KEY, aws_secret_access_key=SECRET_KEY, region_name = 'ap-south-1')cluster = redshift.create_cluster(
DBName = "pokemon", #Required
ClusterIdentifier = 'transfer-data-from-s3', #Required
ClusterType = 'single-node',
NodeType = 'dc2.large', #Required
MasterUsername = 'theguywhoknowsnothing', #Required
MasterUserPassword = 'Iwishiknewsomething18' #Required
)
Note: If you are getting an error that “No default Subnet is present….” Then go to the VPC Management Console (select VPC from Services) and create a default in the Region you provided while creating the Boto3 client API.
Troubleshoot Step 1:
Open VPC Management Console from Services.

Troubleshoot Step 2:
Select “Your VPCs” from the left index. Then select “Create default VPC” from the Actions drop down and your default VPC for the desired region will be created.
Before we move on to the next step, let us validate if our cluster has been successfully created or not:
if cluster['ResponseMetadata']['HTTPStatusCode'] == 200:
print("Cluster is generated")

Step 3: Set Up an Inbound Connection
Now that we have a Redshift cluster, the next step is to establish a secure communication channel to it. Since the cluster operates within a Virtual Private Cloud (VPC), we need to set up an inbound connection to allow data transfer.
This step is crucial because it ensures that the data we move from S3 to Redshift can flow freely and securely. By configuring this connection using an EC2 instance, we create a bridge that links our data storage with our data processing power.
#Create an EC2 resource
ec2 = boto3.resource(
"ec2",
region_name = "ap-south-1",
aws_access_key_id = AWS_ACCESS_KEY,
aws_secret_access_key = SECRET_KEY
)#To extract a specific security group we need the VPC ID
#The VPC id can be fetched from the cluster properties
#Using the cluster identifier extract the cluster properties
cluster = redshift.describe_clusters(
ClusterIdentifier = "redshift-cluster-1"
)["Clusters"][0]#Let us fetch the VPC ID from the extracted cluster properties
security_group_id = cluster["VpcSecurityGroups"][0]["VpcSecurityGroupId"]
security_group = ec2.SecurityGroup(id = security_group_id)
security_group#Now add the inbound rules to the security group to create the connectionresponse = security_group.authorize_ingress(
GroupName = security_group.group_name,
CidrIp = "0.0.0.0/0",
IpProtocol = "TCP",
FromPort = 5439,
ToPort = 5439
)
Step 4: Transfer Data from S3 to Redshift
With the connection established, we’re ready to move the data. This is where the magic happens—taking raw data from S3 and loading it into Redshift, where it can be transformed into valuable insights.
We’ll use a Python library called psycopg2 to execute the necessary queries on our Redshift database. But before we dive into the transfer, it is important to define the schema of our data. By understanding the structure of what we are working with, like the name and type of a Pokémon in the example below, we ensure that the data is organized and ready for analysis.
Once the schema is defined and our connection is active, we can finally transfer the data from S3 to the Redshift table we created. It is a critical moment, as this step transforms our data from static storage to actionable information.

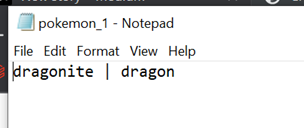
We will load a single record, saved as a pipe (|) delimited file. This consists of two values, name and type of the Pokémon.
#Connect to Redshift DB now
import psycopg2username = cluster['MasterUsername']
password = <Password>
cluster_endpoint = cluster['Endpoint']['Address']
port = cluster['Endpoint']['Port']
database_name = cluster['DBName']conn_string = "postgresql://{}:{}@{}:{}/{}".format(
username,
password,
cluster_endpoint,
port,
database_name
)
con = psycopg2.connect(conn_string)
con
Once we have connected to our Redshift Database, we can now run queries on it:
Time to finally move the data from S3 to the Redshift table we created.
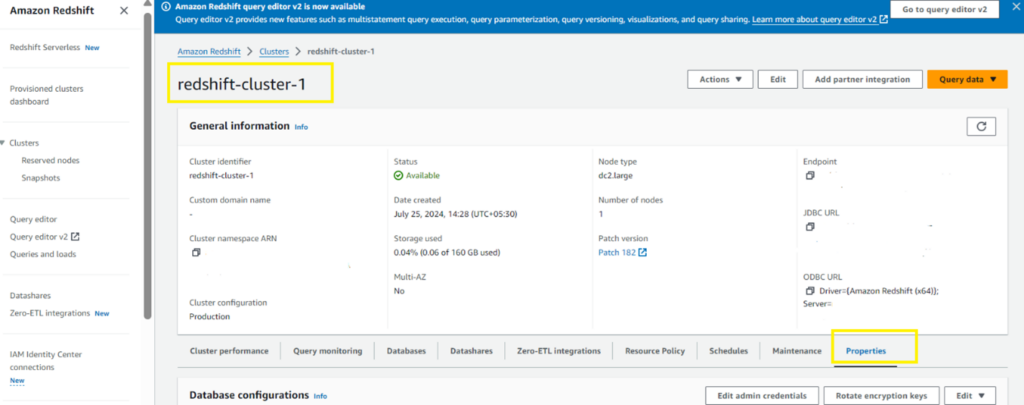
First, make sure the cluster has permission to read from S3, to do this, we navigate to the ‘Properties’ section on the Cluster page, followed by ‘Associated IAM roles’:


From the “Manage IAM roles” select “Create IAM role”. Select permission to read from any or specified S3 bucket. Open the newly generated IAM role and copy the ARN.
sql_query = """
COPY pokemon_team
FROM
's3://pokemon-battle-team-bucket/pokemon_1.txt' /*S3 URI for the file*/
IAM_ROLE 'arn:aws:iam::125094883919:role/service-role/AmazonRedshift-CommandsAccessRole-20220402T223936' /*Open the S3 read access IAM role and copy ARN*/
delimiter '|'
"""execute_query(sql_query, con)#Verify whether the data has moved to the desired table or not
execute_query("select * from pokemon_team", con, True)
Step 5: Delete the Cluster (Optional)
After successfully loading the data, you might want to clean up resources by deleting the Redshift cluster. This step is optional but recommended if you are done with your analysis or want to avoid unnecessary costs.
However, your exploration does not have to end here. The data you have loaded into Redshift is now at your fingertips—ready to be queried, analyzed, and leveraged to drive business decisions. And remember, with AWS services like Redshift Spectrum and Athena, you do not always need to load data into a database to query it; sometimes, you can analyze it directly from S3.
#Note: you can pass in SkipFinalClusterSnapshot as False, if you want to keep a snapshot of your current cluster safe and this way you can resume from where you left of. You also need to specify FinalClusterSnapshotIdentifier in this case.
redshift.delete_cluster(
ClusterIdentifier = "redshift-cluster-1",
SkipFinalClusterSnapshot = True,
)
Feel free to play along with the data you loaded into your Redshift DB. Also, just FYI we do not always need to load data into a database to query it. Thanks to services like Redshift Spectrum and Athena, we can query right off S3 buckets.
Need Help with Implementation?
If you’d prefer to focus on growing your business while leaving the technical setup to experts, we’re here to help.
Our team specializes in designing and deploying data solutions tailored to your unique needs, allowing you to maximize the power of AWS services like Redshift. Reach out to us today, and let’s unlock the full potential of your data together.


